To be able to control your radios and get automatic frequency updates and more, you'll need to configure your rigs within QSO Director.
1 - Open Radio Settings
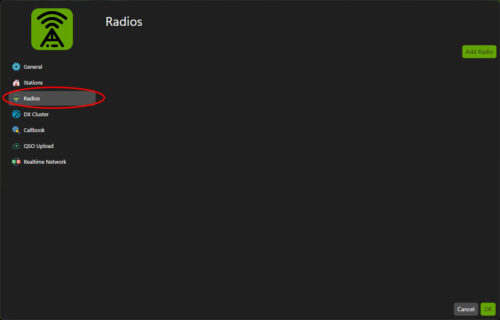
From Within QSO Director, go to File -> Settings and Select Radios from the Settings Menu bar
2 - Add a Radio
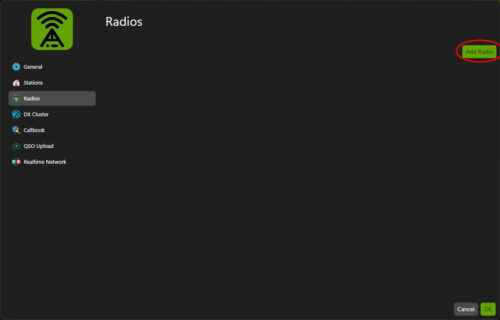
Click the "Add Radio" button on the top right of the settings screen
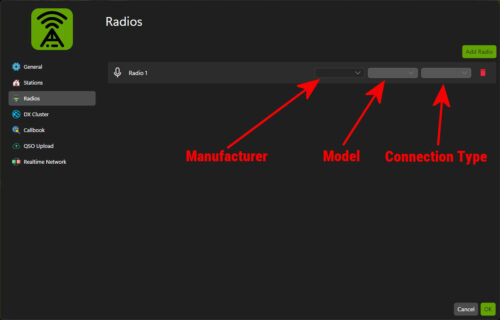
You can then select the Manufacturer, Model and connection type. Each drop down is dynamic showing only the options that are available based on your previous selection.
You can see a full list of all the rigs supported by visiting the Supported Traceivers page.
If you don't see the radio or connection method you need to use, contact us and we'll get it added.
3 - Connection Details
Depending on whether you have selected Serial or Network as the connection method, you will be shown one of the following set of options
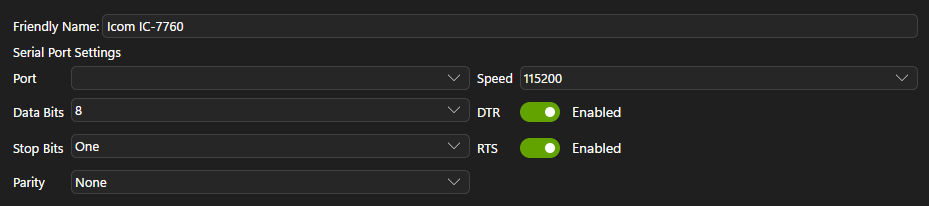
For Serial connections (the most common)
or, for Network connections

Enter the connection details appropriate to your rig. QSO Director will default as much of the details as it can, however you may need to consult your radio's manual or settings to determine the correct settings to use.
4 - Naming your Rig
The "Friendly Name" field will default the make and model of your radio. However you can change this to anything you like. If you use more than one rig of the same model for instance you might want to differentiate between them. Alternatively you may wish to use more descriptive names such as "Left Radio" and "Right Radio".
5 - Removing Radios
Removing a Radio is simple, just click the small red Bin icon next to the radio you wish to remove. You will receive a popup asking you to confirm you want to remove the radio.